
English
Views: 0 Author: Site Editor Publish Time: 2025-10-29 Origin: Site


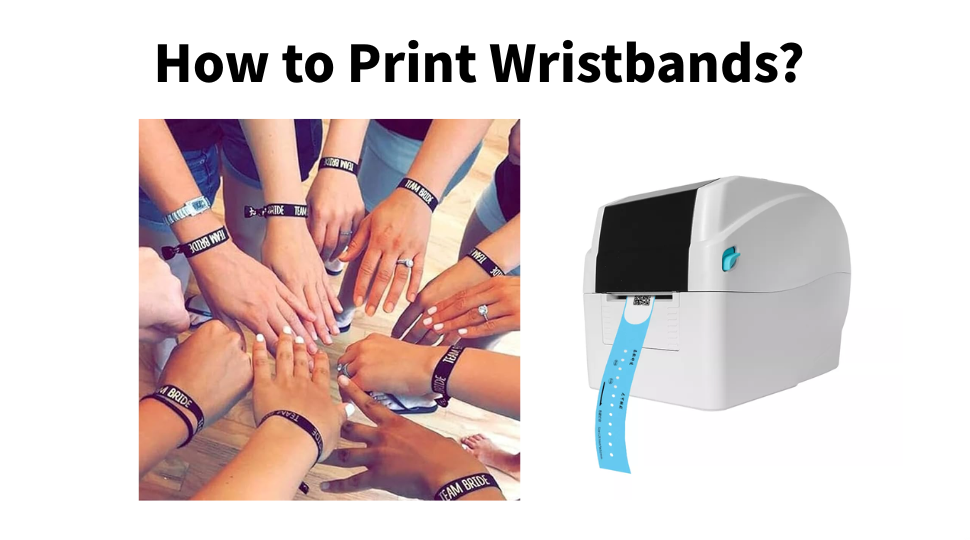
Printing custom wristbands is a straightforward process, but it requires the prerequisite of buying one wristband printer, which has been consistently on the rise for fulfilling numerous demands across a host of industries and sectors. Or, you opt to print the bands from a company that engages in this service.
A wristband printer is a specialized printing device designed to produce durable, tamper-evident, and often secure wristbands for identification, access control, and data tracking. They are a critical piece of hardware in numerous industries where safety, security, and efficient identification are paramount. In addition, they also play a vital role in simplifying management and increasing efficiency for institutions and corporations that use them.
A wristband printer serves as more than a hospital wristband printer; it can also print wristbands for many events, such as concerts, celebratory parties/events, and many more. Hence, wristbandprinters can work with a handful of materials to suit the specific needs.
Here is a comprehensive guide on how to print custom wristbands, covering both the planning and the practical execution.
Planning and Design
This is the most crucial step for ensuring your wristbands look professional and serve their purpose.
1. Define Your Purpose, namely, where will those wristbands that you are going to print be used for?
Access Control: They need to be unique or eye-catching. Having them printed in bright colors will be perfect. Events consume a large number of wristbands for access control. Say you are going to attend a celebrity’s grand wedding ceremony or birthday party; you might be put on a wristband upon accessing the entrance of the event. For a large part, this is to prevent anyone uninvited from showing up at the event. More importantly, for the safety of all the figures, guests, and individuals there at the event.
Identification: (e.g., hospital patient, festival attendee over 21). They need to be legible and durable. Mainly, hospital wristband printers serve the purpose of simplifying the management and promoting the efficiency of overseeing the patients’ conditions.
And a bunch of other purposes skipped here that rarely come into use.
2. Choose Your Wristband Material:
Your choice dictates the printer type, durability, and cost. If a wristband printer machine is new to you, it’s advised to search online to get to know what material will be best to print the type of wristbands that you’ll need.
Tyvek®: Perfect for conferences and short-term events. Tear-resistant, water-resistant, and low-cost. Needless to say, they’re perfect for daylong events held close to a water source. Such as water parks, water sports, and the like.
Thermal Paper: For simple, single-day events. It is low cost but can fade and is not durable, making it the perfect material for events that last no longer than a full day.
PVC/Vinyl (Synthetic): Ideal for hospitals, water parks, and multi-day events. Soft, waterproof, and very durable. Compared with Tyvek, wristbands printed with PVC/vinyl (synthetic) are better for days-long events, especially thoseheld by a water source.
Cloth/Fabric: Best for multi-day festivals and concerts. Comfortable and often used as souvenirs. Not many people take the bands home as souvenirs after the festival or concert is over. Rather, wristbands used for such events are conducive to the management and control of man-flow entering and leaving the concert or scene.
Silicone: Typically used for promotional/loyalty bands. Printing is usually debossed or screen-printed, not done with a standard wristband printer.
3. Design Your Wristband:
Use design software like Adobe Illustrator, Canva, or even Microsoft Word if it's simple. For some event wristband printer manufacturers, they provide customizable software to design your printing style to your preference. The information below is merely for your reference, as they are not mandatory. Like I always said: what suits you will be the best.
Information to Include:
Event/Organization Name & Logo
Date or sequential number
Barcode or QR code (for scanning access or linking to a website)
Text (e.g., "VIP," "All Access," "Over 21")
Patient Details (Name, DOB, ID Number) for Healthcare
Design Tips:
Step 1: Keep it Simple: Wristbands are small. Avoid cluttering with too much text.
High-Contrast Colors: Use dark text on a light background or vice versa for easy reading. Eye-catching really matters here.
Barcode/QR Code Size: Ensure it's large enough to be scanned easily by all types of scanners. Or, make it tiny but with high clarity for easy-to-scan purposes.
Step 2: Choosing Your Printing Method
This is the core decision that determines your equipment and process.
Method A: Using a Professional Wristband Printer (Thermal Transfer or Direct Thermal)
This is the method for on-demand, variable data printing (where each wristband has unique info like a name or barcode).
What You Need:
A wristband printer.
Blank wristband rolls are compatible with your printer.
A thermal transfer ribbon (if using the thermal transfer method).
Wristband design software or a dedicated driver.
The Process:
Source Your Supplies: Purchase blank wristband rolls and ribbons that are certified to work with your specific printer model. Using third-party supplies can sometimes cause jams or void warranties. Usually, it won’t go wrong if you buy the accessory and consumables from the same manufacturer where you’ve bought the wristband printer from.
Install Printer Software & Drivers: Install the necessary software on your computer.
Create or Import Your Design:
Open your design software.
Set up a new label project and select the exact dimensions of your wristband from the template library or enter them manually.
Import your logo, add text fields, and create barcodes within the software.
Connect Data (If Needed): For variable data (like a list of guest names from an Excel sheet), connect the software to your database. You can set up a "print merge" where it automatically prints a unique wristband for each entry in your list.
Load the Printer:
Open the printer.
Load the roll of blank wristbands into the media compartment, ensuring it feeds correctly.
If using thermal transfer, load the ribbon roll (the ribbon goes between the printhead and the wristband).
Calibrate (Often Automatic): Run a calibration from the printer's menu or software. This ensures the printer correctly senses the gap between each wristband, preventing misprints and jams.
Print a Test Sample: Always print one or two test wristbands first. Check for print quality and color, and scan the barcode/QR code to ensure it works.
Start Production: Once satisfied, send the print job. The printer will output individual, perforated wristbands.
Method B: Using a Standard Inkjet/Laser Printer
This is only suitable for pre-printed, non-variable designs on specific sheet-fed wristband materials.
A standard wristband label printer to meet your specific needs.
Sheet-fed wristbands (these come on perforated sheets, like A4 paper).
Design software.
The Process:
Purchase Sheet-Fed Wristbands: Buy the specific sheets compatible with your printer (e.g., inkjet or laser). Laser printers generate heat, so you must use materials rated for them.
Design to Template: The supplier will provide a template file (usually .PDF or .DOC). Place your design precisely within the outlines for each wristband on the sheet.
Print: Load the sheet into your printer's paper tray. Print a test page on regular paper first to check alignment.
Punch Out: Once printed, carefully punch out the individual wristbands along the perforations.
Limitations: Not durable (ink can smudge if wet), not for variable data, and generally less professional-looking than thermal-printed bands.
Method C: Ordering from a Professional Supplier
For large orders, complex designs, or special materials (like cloth, silicone, or RFID bands), it's often best to outsource.
Choose a Supplier: Find a reputable company online if you don’t intend to buy a wristband printer.
Submit Your Design: Upload your print-ready artwork following their specific guidelines (file format, color mode).
Select Material and Features: Choose your wristband type (Tyvek, cloth, vinyl, or RFID), closure type (adhesive, plastic clip, or Tyvek seal), and any special features (sequential numbering or unique barcodes).
Review Proof: The supplier will send you a digital or physical proof for approval before mass production.
Place Order and Wait for Delivery: They will manufacture and ship the finished wristbands to you.
Step 3: Final Steps and Application
Quality Check: After printing, spot-check wristbands for errors, especially if they contain critical information like patient IDs.
Application:
Self-Adhesive: Peel off the backing and press the tip through the secure slot.
Plastic Clip: Insert the pointed end into the clip and snap it shut. These are typically tamper-evident and cannot be reopened without breaking.
Tyvek Seal: The tip is fed through a slot and folded back, adhering to itself.
Summary: Which Method is Right for You?
Scenario Recommended Method Why?
Hospital Ward, Daily Patients' Professional Wristband Printer On-demand, secure, variable data for each patient, highly durable.
Large Music Festival Order from Supplier Best for high volumes, custom materials (cloth/RFID), and complex designs.
Small Community Event Standard Printer + Sheet-fed Bands Cost-effective for a simple, non-variable design for a one-day event.
The On-the-Spot VIP Upgrades Mobile Wristband Printer Portable allows for instant printing of unique wristbands anywhere.
By following these steps, you can effectively choose the right materials, technology, and process to create professional, functional, and secure custom wristbands for any application.

It's best to read the user manual or operation guidelines provided in the wristband printer box. Nowadays, most wristband manufacturers have videos on their YouTube channels guiding the complete process on how to set up from the initial phase of unboxing.
In contrast to owning a wristband printer to fulfill your needs, having your bands printed by placing an order with a specialized wristband printing company is undoubtedly more cost-effective if you don’t print bands often. Or, buying a wristband printer is absolutely a smarter choice to make.
Yes, we seemed not to mention any tips on what type of printers to buy.
After going over all the information above and recapping what you’ve learned, you can make the decision on your own of what type of wristband printer to buy, regardless of whether it's for hospital patients or special events.
